Why Your Hamilton & Ancaster Home Needs Spring Cleanup

Why Your Lawn & Landscape Need Spring Yard Cleanup

The Importance of Tidying Up

Skipping this yearly task can lead to problems in your garden and lawn. These problems include stunted plant growth and attracting pests and diseases. Regularly cleaning your yard is important to keep your plants healthy and prevent pests. That’s why professional yard clean up in Hamilton is important.

Enhancing Curb Appeal: Your Yard’s First Impression

Your yard serves as the canvas to your home, setting the scene for visitors and passersby. A well-manicured outdoor space is inviting and reflects on the care you take in maintaining your property. Enhancing curb appeal can increase your home’s value and is often the simplest way to make a grand impression. Hire a Hamilton landscaper today.

Promoting Plant Health: The Root to a Luscious Garden

Plants, much like people, need a balanced environment to thrive. Removing dead leaves, loosening soil, and improving drainage are important for helping your plants grow and bloom successfully. A clean slate in spring sets the stage for a successful growing season.

Preventing Weed Growth: Stay Ahead of the Weeds

Unwanted plants are relentless, often taking advantage of open spaces to vie for dominance. Keep your garden tidy and weed-free to help your plants grow better. This will ensure they have enough nutrients and space to thrive and stay healthy.

Creating a Safe Outdoor Space: Your Family’s Haven

Your yard is an extension of your living space. A haphazard yard can pose threats of injury and discomfort. Cleaning up debris, cutting back branches, and checking play areas and paths for damage helps to maintain a safe outdoor space. This ensures that your outdoor space is safe for fun and relaxation.

Regularly cleaning up debris and cutting back branches can prevent potential hazards. Checking play areas and paths for damage also helps to ensure safety.

Steps for Effective Spring Yard Cleanup

Raking and Removing Debris: Clearing the Way to Growth

Begin with a thorough raking to remove leaves, branches, and dead vegetation that accumulated over the fall and winter. This allows sunlight and air to penetrate the soil, which is vital for awakening dormant grass and plants. A clean start empowers your yard with the conditions it needs to flourish.

Pruning and Trimming Plants: A Fresh Start

Spring is a time of renewal for plants, and a strategic approach to pruning is key. Remove dead or damaged branches to encourage new growth, and trim overgrown areas to shape your shrubs and trees. Be mindful of the unique needs of different plants and the timing required for their particular life cycle.

Lawn Care and Fertilization: Feeding the Fighters

Your lawn could be hungry after the dormant season. A round of fertilization in early spring can strengthen the roots and promote the lush, green appearance you crave. Additionally, consider reseeding any bare patches to maintain a consistent and healthy lawn coverage.

Mulching and Soil Preparation: The Foundation of Beauty

Mulch is not only aesthetically pleasing, but it also serves a purpose. It retains moisture, regulates soil temperature, and prevents weed growth. Prepare your soil by aerating and adding compost to ensure that it’s fertile ground for your plants to anchor into.

Tools and Resources for Yard Cleanup

Essential Equipment and Supplies: The Gardener’s Arsenal

To tackle your spring cleanup effectively, you’ll need an array of tools, from rakes and pruners to soil testers and mulch. Make sure you stock your inventory with the right supplies to simplify your tasks and maximize your time.

The Science of Cleanup: Leveraging Technology

Technology can be a handy resource for modern yard cleanups. Weather apps and automatic watering systems can make it easier to care for your plants and garden. It makes managing your landscape easier and more efficient.

Maintenance Tips for Sustaining a Beautiful Landscape

Regular Watering and Mowing Schedules: The Routine Regimen

Consistency is key in maintaining a lush and healthy yard. Create a watering plan for your plants and lawn, and mow the lawn regularly to help them grow and prevent pests and diseases.

Pest Control Strategies: Protecting Your Paradise

Keep an eye out for signs of pests and have a strategy for control. Whether it’s using natural predators, organic solutions, or selective pesticides, prompt action can prevent significant damage to your landscape.

Seasonal Plant Care: Nurturing Throughout the Year

Understand the needs of your plants through the seasons. Some may require winter protection, while others benefit from specific care in early spring or fall. Tailoring your maintenance efforts to the season can yield remarkable results in the health and beauty of your landscape.

A spring yard cleanup is not merely a chore—it’s an investment in the health and allure of your outdoor environment. Your hard work now will result in a fun summer with a safe, green yard full of life. As plants start growing, enjoy watching your outdoor area change and feel proud of the peaceful place you’ve created. Happy spring cleaning, and remember you can always hire a professional like Monarch Landscaping to help with your yard clean up.


By Chelsey Smith • October 20, 2026
If work or travel will keep you away after sod installation, arrange the watering and monitoring before booking the job. A timer can help operate a sprinkler, but someone still needs to check coverage, moisture and changes in the weather. If no dependable care arrangement is available, moving the installation date may be the most practical choice. At Monarch Landscaping, we want an Oakville lawn project to fit the weeks after installation as well as the day our crew is on site. Fresh sod brings an immediate visual change, but it still needs to root into the prepared ground. A clear handover helps make sure that important care does not fall between the installer, homeowner and whoever is helping. Treat aftercare as part of the project scope Before choosing a date, write down who will be responsible for the new lawn. That may be you, another household member, a property manager or an agreed service provider. The person needs access to the actual instructions and enough availability to act on them. Avoid a vague arrangement such as “someone will probably water it.” Ask who will check on a workday, who will respond if a hose disconnects and who will make a change after heavy rain. Those are ordinary practical questions, but they are easier to answer before the lawn is installed. Our Oakville sod installation service provides the starting point for discussing the project. During planning, tell us about long shifts, travel dates and any restrictions on access so the care arrangement can be considered alongside the installation scope. Test the water source before installation Check that the outdoor tap works and that the hose reaches every part of the proposed lawn. A setup that watered the old flower bed may not cover the full turf area. Test the complete arrangement, including connectors, sprinkler positions and any timer you intend to use. Do not assume a hose reaching the far corner means that corner receives enough water. Sprinkler distribution changes with position, wind and obstacles. Fences, steps and planting beds can interrupt coverage, leaving strips that are easy to miss from the house. Make the equipment easy for someone else to use Label separate hoses or zones if the setup is complicated. Show the helper how the tap and timer operate, where spare connectors are stored and what to do if water does not reach the far side. A simple sketch can prevent confusion. Keep essential routes usable. A hose stretched across a doorway or a wet path may make the arrangement impractical for the person providing care. Fix those details during the trial rather than expecting them to improvise after you leave.
By Chelsey Smith • October 15, 2026
The first mow after sod installation should happen when the turf is anchoring, the ground can support the mower and the grass is ready for a cut. A fixed number of days is only a planning guide. If the sod moves, the soil is soft or wheels leave tracks, mowing should wait while we review the conditions. At Monarch Landscaping, we want the first cut to support the new lawn rather than disturb it. A Burlington yard can look tall and green before it is ready for normal maintenance. Our checklist focuses on what to inspect, how to prepare the mower and when to stop instead of pushing ahead. Check rooting before looking at the calendar New sod needs to connect with the prepared soil. Until it is anchored, mower movement and sharp turns can shift the rolls or catch an edge. The fact that grass blades have grown does not by itself prove that the entire lawn can tolerate a cut. Use the gentle rooting check described in your aftercare guidance. Do not repeatedly peel back the same corner or lift large sections to inspect them. We want to assess anchoring with minimal disturbance, not interrupt the roots we are waiting to develop. Check more than one representative area if advised. A shaded strip, an exposed edge and the centre of the yard may establish differently. If one section is clearly loose, tell the installer before treating the lawn as uniformly ready. Make sure the ground is firm enough A well-rooted surface can still be too wet for mower traffic. Walk only as needed and observe whether the ground feels soft or shows footprints. Do not drive a mower across the lawn as a test if the conditions already suggest it may rut. Wheel marks can create low areas or disturb contact beneath the turf. The risk is greater where the mower turns or repeatedly follows the same route. Waiting for appropriate surface conditions is part of good maintenance, not a sign that the installation has failed. Review moisture rather than drying the lawn aggressively If the surface is too wet, discuss the watering plan. Do not withhold needed water for an extended period simply to force a mowing window. The aim is to maintain suitable moisture while allowing the surface to support the task. Our sod watering service explains moisture monitoring and weather-based adjustments in Hamilton and Burlington. Whether you manage care yourself or arrange help, the first mowing decision should fit the actual condition of the lawn.
By Chelsey Smith • September 29, 2026
When homeowners ask us about sod installation in Hamilton, the first decision is rarely the type of roll. It is how much work the existing lawn and soil need before new sod goes down. A yard with sound soil and a tired surface may suit a lighter renovation. A lawn with pervasive weeds, poor drainage, uneven grade or weak soil may need old material removed and the growing surface rebuilt. We offer standard and premium installation options because those situations should not receive the same preparation by default.  Our goal is to recommend work that fits the property, then make clear what happens before, during and after the installation. A freshly laid lawn can look good immediately while important differences remain hidden below it. This guide explains the distinction between our published options, the signs we look for and the questions to ask before approving a plan. An on-site assessment determines the final scope.
By Chelsey Smith • September 16, 2026
A new lawn can make an Oakville property look finished in a day, but the sod will follow the ground beneath it. If that ground has low spots, ruts or an unsuitable route for rainwater, a green surface may conceal the issue only until the next storm or mowing. We assess the grade before laying sod because the shape of the soil affects drainage, use and root contact. Installing first and trying to correct the shape afterward usually means disturbing the new turf. Grading does not mean making every yard perfectly flat. A lawn needs a smooth, usable surface and an appropriate way for water to move. The solution depends on the home, hardscape, neighbouring grades and existing drainage. Here is what we look for, what sod can and cannot solve, and how to discuss grading in an installation plan. The difference between smooth and flat A smooth lawn is comfortable to walk and mow. Its surface has no abrupt holes, humps or deep equipment tracks. A flat surface, however, may retain water if it offers no useful path away from low areas. We aim for a grade that serves the property rather than a visual illusion of levelness. Sometimes a gentle, deliberate slope is exactly what prevents water from standing beside the house or at the bottom of a yard. We look at existing elevations around doors, patios, sidewalks, garden beds and fences. Raising a lawn can create an awkward step to a path or put soil too close to a structure. Lowering it without understanding where the water goes can create a basin. These details matter more than an abstract desire for a billiard-table lawn. The best grade works with the whole site. Where does rainwater go now? Watch the yard during a storm or soon afterward. Does water move across the lawn evenly, concentrate in a channel or remain in one spot? Is it coming from a downspout or an adjacent hard surface? Does it collect near a foundation, gate or walkway? Photographs can help us understand a problem that is not visible on a dry site visit. Tell us whether puddles disappear quickly or linger for days.  Sod is vegetation, not a drainage system. Its roots can help stabilize a suitable surface as they establish, but the rolls cannot reverse the direction of runoff or fill a deep low point. A persistent wet area may need grading, soil work or a separate drainage assessment. We avoid promising that a cosmetic lawn replacement will solve a water issue with an unknown source.
By Chelsey Smith • September 10, 2026
A shaded lawn can look like an easy candidate for fresh sod. The bare soil disappears under green rolls, and the yard feels complete again. The harder question is whether the new grass will receive enough light and suitable growing conditions to stay healthy. We do not want to sell a Cambridge homeowner a day-one transformation that is likely to thin in the same place as the previous lawn. Before recommending sod installation, we look at the pattern of shade, competing roots, moisture and how the space is used. Shade is not one condition.  Morning sun with afternoon shade differs from a narrow strip between buildings, and an open tree canopy differs from deep shade beneath evergreens. A lawn can also struggle because the soil under a tree is dry despite nearby shaded ground remaining wet. The right plan comes from observing the actual yard over the day and season. Sometimes sod is suitable with realistic expectations; sometimes another surface or planting strategy serves the space better. Measure useful daylight, not the word “shady” Start by noting when direct sunlight reaches the area. Check in the morning, at midday and in late afternoon, and remember that tree leaves change the light through the year. A photo from one hour on a bright day does not show the whole pattern. Tell us whether buildings, fences or mature trees cause the shade. A lawn that gets several useful hours of sun may behave differently from an area that remains dim throughout the growing season. We avoid promising that one turf variety will thrive in deep shade. Monarch commonly describes Kentucky bluegrass sod on our service pages; that does not mean it is the right answer for every dark corner. The available sod product, the amount of light and the intended use should all be discussed before installation. A site assessment may lead to a different turf selection where available or to a non-lawn solution for the most difficult section. Tree roots create more than shade A mature tree competes with turf for water and nutrients. Its roots may occupy the top layer where sod needs to establish, and the ground can be dry even though it feels cool and shaded. Heavy leaf litter can cover grass during parts of the year. Some trees also have low branches that further reduce light and make mowing awkward. We look at those combined pressures rather than attributing every thin patch to shade alone. We are careful around roots and the tree’s base. Adding a thick layer of soil over roots or burying the root flare is not an automatic fix for grass. Aggressive excavation can damage the tree. Sometimes a wider mulch or planting area beneath the canopy is more sensible than trying to push sod to the trunk. If a turf area is still desired, we discuss where it has enough light and soil to be practical.
By Chelsey Smith • September 9, 2026
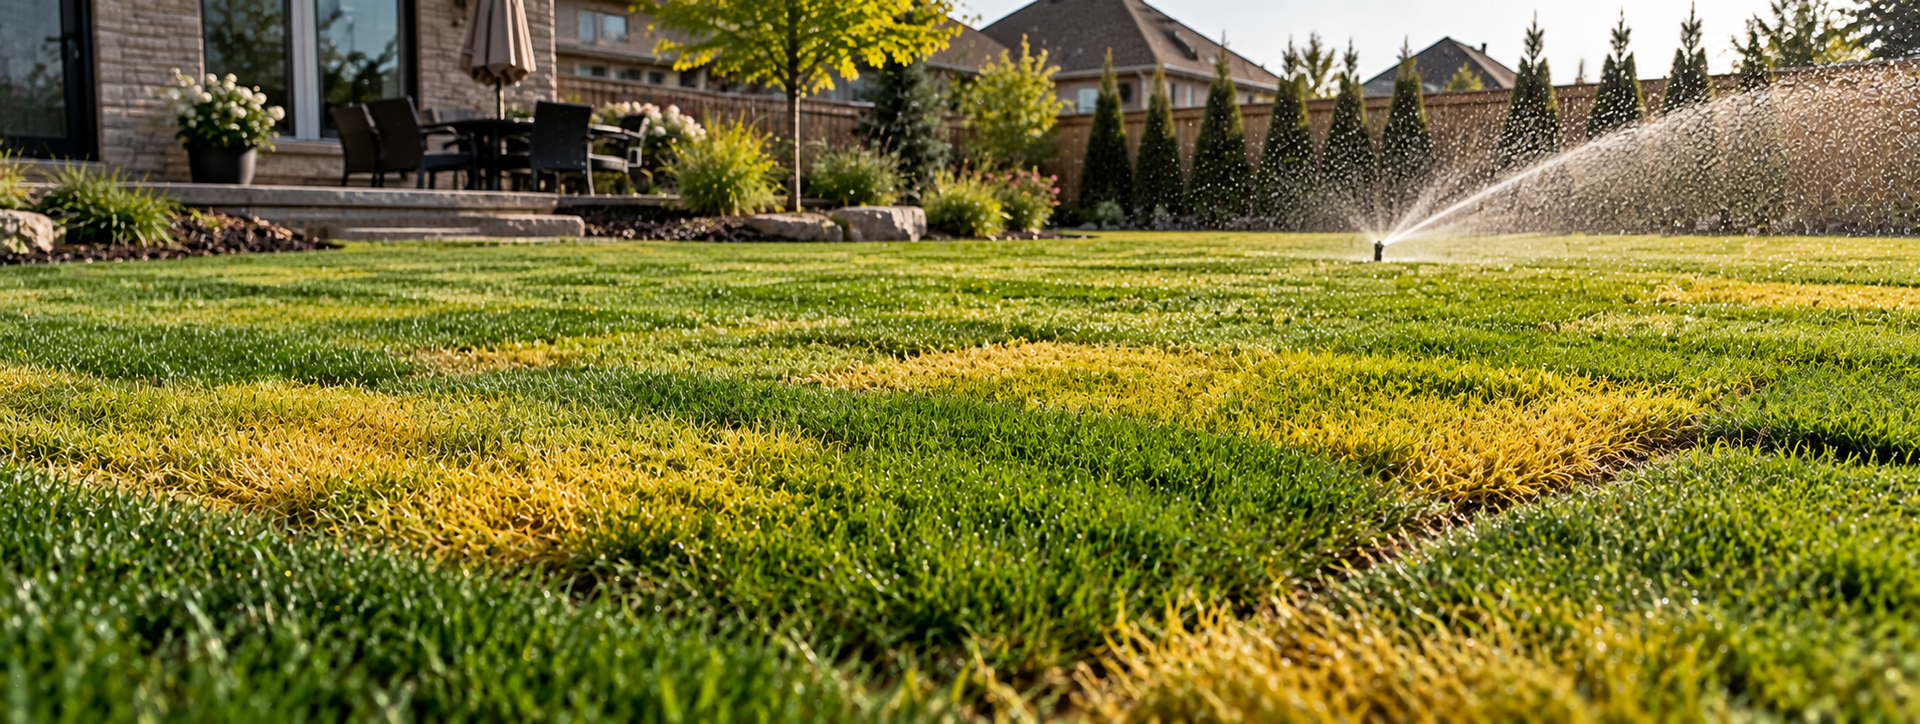
A yellow patch in a newly installed lawn can be alarming. We understand why: the sod looked uniformly green when it went down, and you have been making an effort to care for it. Yellowing does not have one automatic explanation. An exposed edge may dry before the centre, a low spot may stay too wet, a roll may have poor soil contact, or the lawn may be under stress from heat or traffic. The pattern and timing help us identify what to check next.  For Niagara homeowners, the most useful first step is to observe the lawn closely without immediately applying more water or fertilizer everywhere. A diagnosis needs the soil conditions beneath the grass, not only the colour of the leaves. At Monarch Landscaping, we would ask when the change began, where it appears and what the watering and weather have been like. This guide will help you collect that information and decide when to contact us. Start with the shape of the yellow area Is the change confined to a seam, a strip beside pavement, the top of a slope or a broad section of lawn? A narrow edge can dry differently from the centre because it has more exposure to sun and heat. A strip that follows a sprinkler gap may point to uneven coverage. A patch at the bottom of a grade can stay wetter than the area above it. A roll-shaped rectangle raises a different question about contact, delivery condition or watering. Take dated photographs from the same viewpoint so you can see whether the area is spreading. Note whether the leaves are dry and brittle, limp, or still moist. Avoid walking extensively on a new, wet lawn just to inspect every inch. If you must check an edge, do so carefully and do not pull up large sections. The pattern is evidence, not proof of one cause. Check moisture below the blades A green or wet-looking surface does not tell you whether the soil underneath has received enough water. Carefully check at an accessible edge in a healthy area and a yellowing area. Is the sod’s underside moist, and is the soil below it moist? Are there dry gaps or is the bed saturated? Compare multiple locations. A sprinkler may cover the centre while missing the edges, and rain may not reach a sheltered section as evenly as expected. We do not recommend responding to every yellow patch by flooding the whole lawn. Overly wet soil can limit root health and create a soft surface that is easily rutted. If one area is dry, adjust coverage and timing for that area. If it is persistently soggy, look at the watering schedule, runoff and grade. Our Niagara sod installation page provides general aftercare, but a changing lawn needs attention to its actual conditions.
By Chelsey Smith • August 28, 2026
How to Choose the Right Fence Company for a Niagara Property A fence is a long-term part of the property. Choosing the right contractor is as important as choosing the material because layout, posts, gates, drainage and workmanship determine how the system performs. A reliable Niagara fence company should provide clear information, inspect the site and recommend a solution based on the owner’s priorities. Use the following criteria to compare options. Look for Relevant Local Experience Niagara includes urban lots, rural properties, changing grades and varied exposure. Ask whether the contractor has completed projects with similar access, material and design requirements. Local experience should appear in the questions the contractor asks about drainage, boundaries, wind, landscaping and municipal requirements. Review Material Knowledge A qualified company should explain the differences between wood, vinyl, chain-link, ornamental metal and other systems. The discussion should cover maintenance, privacy, repairability, lifespan and site suitability. Be cautious when every property receives the same recommendation without regard to goals or exposure. Ask for a Site-Specific Estimate Accurate pricing requires fence length, height, gates, removal work, grade and access. A detailed estimate should describe materials, posts, hardware, cleanup and payment terms. Clarify allowances and conditions that could change the price. Written scope protects both parties. Evaluate the Post and Footing Plan Posts are the structural foundation of the fence. Ask how depth, spacing and footing method will be selected for the fence system and property. A contractor should be able to explain how gates and solid privacy panels receive adequate support. Confirm Boundary and Utility Procedures Property owners should provide reliable boundary information. Required utility locations must be completed before digging, and private services may need separate identification. A professional company will not encourage work based on guesswork or skip required safety procedures. Discuss Slopes and Transitions Review how the fence will handle grade changes, retaining walls, neighbouring fences and corners. Stepped and custom approaches create different appearances and gaps. Ask for a clear explanation before posts are set. Review Property Protection and Cleanup Installation involves excavation and material movement. Ask how lawns, gardens, driveways and neighbouring areas will be protected. Confirm disposal of the old fence, handling of excavated soil and restoration around disturbed areas. Monarch Landscaping describes using ground mats and completing site cleanup as part of its fence work. Ask About Workmanship Coverage Understand the difference between manufacturer material coverage and the installer’s workmanship warranty. Ask what is covered, the duration and the process for reporting a concern. All warranty details should appear in writing. Product documentation should be provided when applicable. Consider Communication Identify the person responsible for scheduling, site questions and changes. Reliable communication before the project is a useful indicator of how the installation will be managed. Ask how delays, weather and unexpected site conditions will be communicated. Check Completed Work and Reviews Photographs can demonstrate alignment, gates, transitions and finish quality. Reviews reveal punctuality, cleanup and responsiveness. Focus on examples similar to your project rather than only dramatic showcase properties. Compare Long-Term Value Price matters, but the cheapest quote may omit robust posts, quality hardware, removal or restoration. Compare complete scope and expected ownership costs. A properly planned fence can reduce repair needs and provide more consistent privacy, security and curb appeal. Questions to Ask Each Contractor What material and style do you recommend for this property, and why? How will you confirm the layout and gate locations? What posts, footings and hardware are included? How will grade changes be handled? Who completes the work and supervises the site? What protection, cleanup and restoration are included? What warranties apply? What is the expected schedule?
By Chelsey Smith • August 25, 2026
Fence installation in Cambridge requires decisions about boundaries, local requirements, material, privacy, gates and long-term maintenance. Planning these elements together creates a fence that looks intentional and performs reliably. Experienced Cambridge fence contractors can assess grade, access, soil and existing landscaping before recommending a system. Homeowners should still understand the main planning steps and verify property-specific requirements. Do You Need a Permit for a Fence in Cambridge? Permit and bylaw requirements depend on the type, height, location and purpose of the fence. Pool enclosures, corner lots and properties with visibility concerns may have additional rules. Requirements can change. Confirm current information directly with the City of Cambridge before construction, and do not rely on a neighbouring fence as proof that a design is compliant. Confirm Property Boundaries Use reliable survey information or obtain professional boundary assistance when necessary. Existing fences and hedges may not follow the legal line. Discuss ownership and access with neighbours where the project affects a shared boundary. Written clarity can prevent misunderstandings about placement and cost. Arrange Utility Locations Required utility-location procedures must be completed before excavation. Private services such as irrigation, lighting or lines to detached structures may require separate identification. Tell the contractor about known underground features and do not move layout markings.
By Chelsey Smith • August 21, 2026
A damaged fence rarely fails all at once. Most problems begin with a loose board, shifting post, sticking gate or small area of rot. Hamilton’s freeze-thaw cycles, wet weather, wind and changing soil conditions can turn those minor defects into larger structural issues when they are left unattended. If you are searching for fence repair in Hamilton , you likely want to know whether the problem is urgent, whether it can be fixed and whether repairing the existing fence is worth the cost. The answer depends on the cause of the damage, the condition of the surrounding components and how well the fence still serves your property. When Does a Damaged Fence Need Professional Attention? Call a fence contractor when a section is unstable, a post moves at ground level, a gate no longer closes securely, sharp or broken components create a hazard, or damage affects privacy, pets or property security. Prompt assessment is also important after a vehicle impact, fallen branch or major wind event because the visible damage may not show what happened below grade. A cosmetic issue such as light weathering is usually less urgent. Structural movement is different. Posts, footings, rails and gate supports work together, so one failing component can place additional stress on the rest of the fence. Leaning or Loose Fence Posts A leaning fence section often points to a post or footing problem. The post may have rotted near the soil line, the concrete footing may have shifted, or saturated soil and frost movement may have reduced support. Impact and wind can also loosen a post without immediately breaking the surrounding panels. Do not rely on a temporary brace as a permanent solution. A contractor should determine whether the post can be reset, whether it needs replacement and whether the footing or drainage conditions contributed to the failure. If several posts lean in the same direction, the problem may be broader than one isolated repair. Wood Rot Near the Ground Wood is most vulnerable where moisture remains trapped around posts, bottom boards and lower fence components. Signs of deterioration include softness, crumbling fibres, dark staining, fungal growth and fasteners that no longer hold securely. One rotten board or post may be replaceable when the rest of the fence remains healthy. Widespread rot usually indicates that the fence is approaching the end of its useful life or that drainage, soil contact and maintenance conditions need to be corrected. Replacing damaged wood without addressing constant moisture may only delay the same problem. Loose, Warped or Missing Fence Boards Wind, dried lumber, seasonal movement and corroded fasteners can loosen wood boards. Warped boards may pull away from rails or create gaps that reduce privacy. Missing boards also expose neighbouring components to more wind pressure. A selective repair can work well when the rails and posts are still sound. Replacement boards should match the existing dimensions, and exterior-rated fasteners should be used. The supporting rail should be inspected before new material is attached; fastening a new board to a weakened rail does not restore the panel’s strength. Sagging or Misaligned Gates Gates receive more movement than stationary fence panels. Sagging can result from worn hinges, inadequate bracing, a distorted frame or a moving support post. A gate that drags, will not latch or must be forced closed should be inspected before the frame and hardware sustain additional damage.  Minor alignment or hardware problems may be corrected with adjustment or replacement parts. When the support post moves, the repair must address the post and footing. Simply relocating the latch may make the gate close temporarily without correcting the structural cause. Rust and Corrosion on Metal or Chain-Link Fencing Chain-link and ornamental metal fences should be inspected around connections, cut ends, posts, rails and hardware. Moisture and winter salt exposure can accelerate corrosion. Light surface rust may be manageable, but deep corrosion, perforation or weakened structural components generally requires replacement. Use components and coatings that are compatible with the existing system. Mixed metals and unsuitable fasteners can contribute to premature corrosion. Gates deserve particular attention because hinges and latches can fail before the surrounding fence. Cracked or Damaged Vinyl Components Vinyl fencing does not rot, but panels, rails and caps can crack after impact or severe stress. Damage may also occur when a panel has insufficient room for seasonal movement or is forced into a misaligned opening. Cracked structural pieces usually need replacement because patching may not restore their performance. Before proceeding, confirm that matching components remain available and inspect the adjacent posts and rails. Replacing the visible piece without correcting alignment can cause the new component to fail. Gaps Under the Fence Openings can develop because of erosion, animal activity, drainage patterns or changes in grade. These gaps can affect privacy and allow pets to leave the yard. Filling them with loose soil may provide only a temporary result if water continues to wash the area away. Depending on the cause, the solution may involve grading, drainage improvements, a bottom board, selective reconstruction or a landscaping adjustment. The repair should maintain safe clearances and avoid directing water toward neighbouring properties or fence footings. Storm, Branch and Impact Damage Wind, falling branches and vehicles can damage posts and connections beyond the obvious broken panel. Keep people and pets away from unstable sections and avoid pulling or climbing on the fence. Photograph the damage and inspect neighbouring panels for movement. Emergency stabilization may be needed before permanent work begins. A professional assessment can identify which components remain reusable and whether the original layout, footing or material should be changed during reconstruction.
By Chelsey Smith • August 17, 2026
Choosing the right fence height isn’t just a design decision it affects your privacy, security, curb appeal, and compliance with Burlington bylaws. As a leading Burlington fence contractor , Monarch Landscaping helps homeowners select fence heights that balance aesthetics, function, and local regulations. This guide breaks down everything Burlington homeowners need to know before installing a fence, including height rules, material considerations, and how to choose the right style for your property. Why Fence Height Matters Fence height influences three major factors: Privacy Higher fences (typically 6 ft) create a more secluded backyard, shielding your space from neighbouring homes and busy streets. Burlington’s suburban neighbourhoods often benefit from privacy fencing due to close lot lines.  Security A taller fence can deter trespassers, protect pets, and create a defined boundary. For homes backing onto parks, trails, or commercial areas, height becomes even more important. Curb Appeal Front‑yard fences are usually shorter (3–4 ft) to maintain visibility and enhance the home’s architectural style. Height plays a major role in how welcoming or closed‑off your property feels.